출처 : http://shinnara.tistory.com/204
===================================================================================================
조금 전에 스텔라리움이라는 오픈소스 천문 프로그램에 대한 소개글을 올렸습니다. 글에 써 있듯이 한글 문제로 인해 실행이 안되는 현상이 보였습니다. 그래서 오픈 소스인 만큼 소스를 받아서 고쳐볼까하는 생각을 하게 되었습니다. 평소에 Java 를 주된 개발 언어로 사용하다보니 C 와 관련된 툴은 거의 사용하지 않습니다. 이상하게도 저랑 C는, 특히 Visual C++ 은 별로 친하지 않더군요. 회사나 학교에서도 거의 Java 만 사용합니다.
그런데 요즘 들어 오픈소스 커뮤니티에 대해 많은 관심을 가지게 되면서 C의 필요성을 크게 느끼고 있습니다. 그래서 예전 기억을 살려 다시금 C를 하려고 하는데, 그렇다고 Visual C++ 툴을 이용하고 싶지는 않았습니다. 평소에 자주 이용하는 Eclipse 를 개발툴로 정하고, Eclipse 에서 어떻게 하면 C를 사용할 수 있는 지를 알아보았습니다.
Eclipse 의 홈페이지에 가보니 C 개발을 위한 CDT 라는 환경을 지원합니다. 특별히 다운받기 보다는 Eclipse 의 업데이트 과정을 통해서 설치를 할 수 가 있는데, 오늘자로볼 때 최신 CDT 버전은 4.0.1 입니다. (관련 페이지는 이곳 ) 그런데 4.0.x 는 Eclipse 3.3 이상에서 실행하도록 되어 있습니다. 제가 그동안 쓰고 있던 Eclipse 의 버전이 3.2 였던 관계로 이클립스를 다시 설치해야 했습니다. 오늘을 기준으로 최신 버전은 3.3.1.1 입니다.
설치를 하고나서, Eclipse Update 를 통해 CDT 를 설치합니다. 설치를 끝내면 다시 시작하라는 메시지가 나옵니다. Eclipse 를 다시 시작해 보니 다음과 같은 모습입니다.
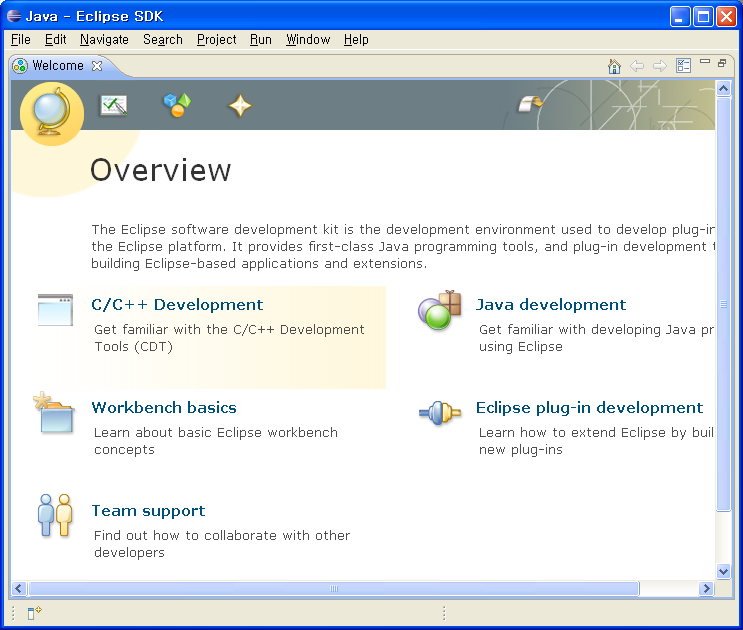
Welcome 화면에 C/C++ Develpment 라는 항목이 생겨있네요. File 메뉴에서도 C/C++ 을, Perspective 에서도 C/C++ 을 설정할 수 있습니다.
제대로 설치가 되었느지를 확인해보기 위해 helloworld.c 를 만들어보았습니다.
하도 오랫동안 C를 안써봤더니 이게 맞는 소스인지는 모르겠습니다. 별다른 메시지가 나타나지 않길래 Run 을 해보았습니다. 그런데 이게 왠일입니까? 다음과 같은 에러를 나타내며 실행이 안됩니다.
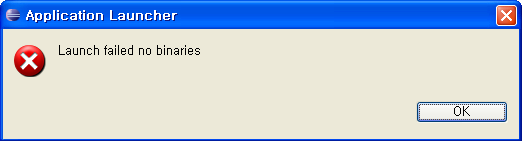
"Launch failed no binaries"
binary 가 없다면서 실행이 안되는다는 것입니다. 도대체 무슨 소린지... 그래서 CDT Help 를 찾아보았습니다.
C/C++ Development User Guide 의 가장 처음 문서 "Before you begin" 을 보니 다음과 같은 내용이 있습니다.
Windows 에서 CDT를 사용하기 위해서는 cygwin 이나 MinGW 가 필요하다는 것입니다. 그래서 MinGW 를 설치하였습니다.
MinGW 5.1.3 다운로드
저는 Automated MinGW Installer를 다운받아 실행했습니다. 설치를 하게되면 설치할 Component 를 선택하는 메뉴가 나오는데, 위의 설명에서와 같이 MinGW basetools 과 g++ compiler 를 선택합니다. 위의 설명에 보면 절대로 MinGW Make는 설치하지 말라고 나옵니다.

설치할 디렉토리를 선택하면 인스톨러가 설치 파일을 다운로드하여 설치를 해줍니다.
설치가 끝나면 디버거를 설치하는데요, 여기 에서 gdb-6.6.tar.bz2 를 다운받아 MinGW 의 설치디렉토리에 압축을 풉니다. 저의 경우, 몇몇 화일이 이미 존재한다고 나오길래 덮어썼습니다. ^^
Makefile 을 이용하기 위해서는 MSYS 를 설치합니다. 설치파일은 MSYS-1.0.10.exe
기본 설치가 끝나면 post-install 과정에서 mingw 의 설치 디렉토리를 d:/mingw 와 같은 형식으로 입력해줍니다.
그리고 나서 Eclipse 를 새로 시작하여 새 프로젝트를 생성해봅니다.
C Project 를 시작하려하니 오른쪽 toolchain 에 MinGW GCC 라는 것이 보입니다.
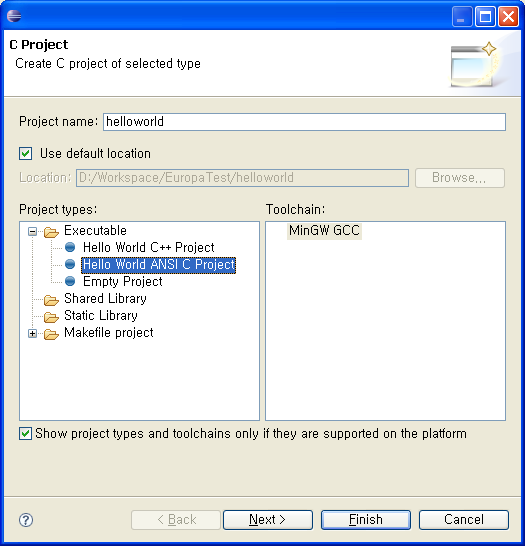
제대로 동작하는 지를 알아보기 위해 Hello World ANSI C Project 를 선택합니다.
Project Wizard 가 끝나고 나면 소스 코드를 볼 수 있는데 다음과 같이 바꿔보았습니다.
Run 을 해보니 역시 제대로 동작하는 군요. 블로그에 올리기위해 이클립스를 프레임을 잔뜩 줄여봤는데 모습이 이상하군요. 어쨌든 제대로 동작하는 것을 확인할 수 있습니다.

이제 개발환경이 갖추어졌으니, 멋지게 개발하는 일만 남았네요. Eclipse, 참 좋은 개발 환경입니다 ^^
===================================================================================================
음.. 참고로 이클립스는 자바용 이클립스로 하면되고, C IDE 이클립스를 사용하면 설정이 안먹히는거 같다.
굳이.. Visual Studio 가 있는데 이클립스로 하려는 이유는...
모바일 게임기 계열이 리눅스프로그래밍을 많이 하는데, 리눅스 프로그래밍에선 vi 아니면 이클립스 for linux 만 있지... VS는 없기 때문.. orz
===================================================================================================
그런데 요즘 들어 오픈소스 커뮤니티에 대해 많은 관심을 가지게 되면서 C의 필요성을 크게 느끼고 있습니다. 그래서 예전 기억을 살려 다시금 C를 하려고 하는데, 그렇다고 Visual C++ 툴을 이용하고 싶지는 않았습니다. 평소에 자주 이용하는 Eclipse 를 개발툴로 정하고, Eclipse 에서 어떻게 하면 C를 사용할 수 있는 지를 알아보았습니다.
Eclipse 의 홈페이지에 가보니 C 개발을 위한 CDT 라는 환경을 지원합니다. 특별히 다운받기 보다는 Eclipse 의 업데이트 과정을 통해서 설치를 할 수 가 있는데, 오늘자로볼 때 최신 CDT 버전은 4.0.1 입니다. (관련 페이지는 이곳 ) 그런데 4.0.x 는 Eclipse 3.3 이상에서 실행하도록 되어 있습니다. 제가 그동안 쓰고 있던 Eclipse 의 버전이 3.2 였던 관계로 이클립스를 다시 설치해야 했습니다. 오늘을 기준으로 최신 버전은 3.3.1.1 입니다.
설치를 하고나서, Eclipse Update 를 통해 CDT 를 설치합니다. 설치를 끝내면 다시 시작하라는 메시지가 나옵니다. Eclipse 를 다시 시작해 보니 다음과 같은 모습입니다.
Welcome 화면에 C/C++ Develpment 라는 항목이 생겨있네요. File 메뉴에서도 C/C++ 을, Perspective 에서도 C/C++ 을 설정할 수 있습니다.
제대로 설치가 되었느지를 확인해보기 위해 helloworld.c 를 만들어보았습니다.
#include <stdio.h>
void main()
{
printf("HelloWorld");
}
void main()
{
printf("HelloWorld");
}
하도 오랫동안 C를 안써봤더니 이게 맞는 소스인지는 모르겠습니다. 별다른 메시지가 나타나지 않길래 Run 을 해보았습니다. 그런데 이게 왠일입니까? 다음과 같은 에러를 나타내며 실행이 안됩니다.
"Launch failed no binaries"
binary 가 없다면서 실행이 안되는다는 것입니다. 도대체 무슨 소린지... 그래서 CDT Help 를 찾아보았습니다.
C/C++ Development User Guide 의 가장 처음 문서 "Before you begin" 을 보니 다음과 같은 내용이 있습니다.
Windows
For windows, MinGW, and Cygwin are the two main choices for acquiring the GNU toolchain:
- Cygwin is a port of the Linux environment to Windows. It provides a compatibility layer in a set of DLLs. These DLLs are GPL licensed, making any code that links to them also subject to the GPL. Cygwin, however, does provide the fullest implementation of the GNU toolchain by supporting the GNU libc C runtime library.
- MinGW is a port of the GNU toolchain to the Windows platform. The biggest difference over Cygwin is that MinGW uses the Windows C runtime libraries (mscvrt) instead of GNU's libc. As a result, a compatibility layer is not required, thus avoiding the GPL issues with Cygwin. There are differences, though, between the Windows and GNU C runtime libraries that will make writing portable applications more difficult.
However, MinGW provides the best integration support with the CDT due to it's direct support for the Windows environment.
The following are instructions and links on how to install the current version of MinGW. Note that these links may become inaccurate over time as new versions of MinGW components are introduced. Please check the MinGW File Release section for the latest versions.
- Download and run the MinGW setup program, MinGW-5.1.3.exe.
- Select download and install the MinGW base tools and the g++ compiler. You may select the Current or Candidate version of these tools. You may also install any of the other available compilers as well.
Do not install the MinGW Make feature as the MSYS version of make from step 5 is a more complete implementation of make.
- The MinGW setup program currently does not install the gdb debugger. To install the debugger, download the file from the following location: gdb-6.6.tar.bz2
- Extract the contents of the file gdb-6.6.tar.bz2 to the same location where you installed MinGW.
- If you want to use Makefile projects, download and run the setup program from the following location: MSYS-1.0.10.exe. MSYS provides an implementation of make and related command line tools. This is not required for other types of projects with the MinGW toolchain, which use CDT's internal build tools to perform the build
Windows 에서 CDT를 사용하기 위해서는 cygwin 이나 MinGW 가 필요하다는 것입니다. 그래서 MinGW 를 설치하였습니다.
MinGW 5.1.3 다운로드
저는 Automated MinGW Installer를 다운받아 실행했습니다. 설치를 하게되면 설치할 Component 를 선택하는 메뉴가 나오는데, 위의 설명에서와 같이 MinGW basetools 과 g++ compiler 를 선택합니다. 위의 설명에 보면 절대로 MinGW Make는 설치하지 말라고 나옵니다.
설치할 디렉토리를 선택하면 인스톨러가 설치 파일을 다운로드하여 설치를 해줍니다.
설치가 끝나면 디버거를 설치하는데요, 여기 에서 gdb-6.6.tar.bz2 를 다운받아 MinGW 의 설치디렉토리에 압축을 풉니다. 저의 경우, 몇몇 화일이 이미 존재한다고 나오길래 덮어썼습니다. ^^
Makefile 을 이용하기 위해서는 MSYS 를 설치합니다. 설치파일은 MSYS-1.0.10.exe
기본 설치가 끝나면 post-install 과정에서 mingw 의 설치 디렉토리를 d:/mingw 와 같은 형식으로 입력해줍니다.
그리고 나서 Eclipse 를 새로 시작하여 새 프로젝트를 생성해봅니다.
C Project 를 시작하려하니 오른쪽 toolchain 에 MinGW GCC 라는 것이 보입니다.
제대로 동작하는 지를 알아보기 위해 Hello World ANSI C Project 를 선택합니다.
Project Wizard 가 끝나고 나면 소스 코드를 볼 수 있는데 다음과 같이 바꿔보았습니다.
/*
============================================================================
Name : helloworld.c
Author : Shinnara
Version :
Copyright : It's Free
Description : Hello World in C, Ansi-style
============================================================================
*/
#include <stdio.h>
#include <stdlib.h>
int main(void) {
puts("Hello World! I'm Shinnara"); /* prints !!!Hello World!!! */
return EXIT_SUCCESS;
}
============================================================================
Name : helloworld.c
Author : Shinnara
Version :
Copyright : It's Free
Description : Hello World in C, Ansi-style
============================================================================
*/
#include <stdio.h>
#include <stdlib.h>
int main(void) {
puts("Hello World! I'm Shinnara"); /* prints !!!Hello World!!! */
return EXIT_SUCCESS;
}
Run 을 해보니 역시 제대로 동작하는 군요. 블로그에 올리기위해 이클립스를 프레임을 잔뜩 줄여봤는데 모습이 이상하군요. 어쨌든 제대로 동작하는 것을 확인할 수 있습니다.
이제 개발환경이 갖추어졌으니, 멋지게 개발하는 일만 남았네요. Eclipse, 참 좋은 개발 환경입니다 ^^
===================================================================================================
음.. 참고로 이클립스는 자바용 이클립스로 하면되고, C IDE 이클립스를 사용하면 설정이 안먹히는거 같다.
굳이.. Visual Studio 가 있는데 이클립스로 하려는 이유는...
모바일 게임기 계열이 리눅스프로그래밍을 많이 하는데, 리눅스 프로그래밍에선 vi 아니면 이클립스 for linux 만 있지... VS는 없기 때문.. orz
'C/C++언어' 카테고리의 다른 글
| 함수를 매개변수로 하는 소스예제 (0) | 2008.07.28 |
|---|---|
| Eclipse 에서 Cygwin을 사용하여 C 컴파일 해보기 (1) | 2008.07.09 |
| putty가 적응되지 않는 사람들을 위한 울트라 에디터 사용법 (1) | 2008.07.03 |
| 이클립스로 SFTP 사용하기 (0) | 2008.06.24 |
| C에서 string 문자열을 float 로 바꾸기 (1) | 2008.06.15 |